Scenario Introduction: Corporate Fund Realignment#
Real-World Business Scenario: > Global Logistics Ltd. operates multiple distinct company structures (profiles) under a single overarching parent partner setup. Due to a seasonal project requirement, their corporate entity (From Company) needs to shift 500,000 NGN out of its operational budget over to an affiliate sub-profile (To Company) to cover sudden warehouse local handling costs. The finance analyst must trace, route, and document this internal liquidity balancing movement safely inside the ERP platform.
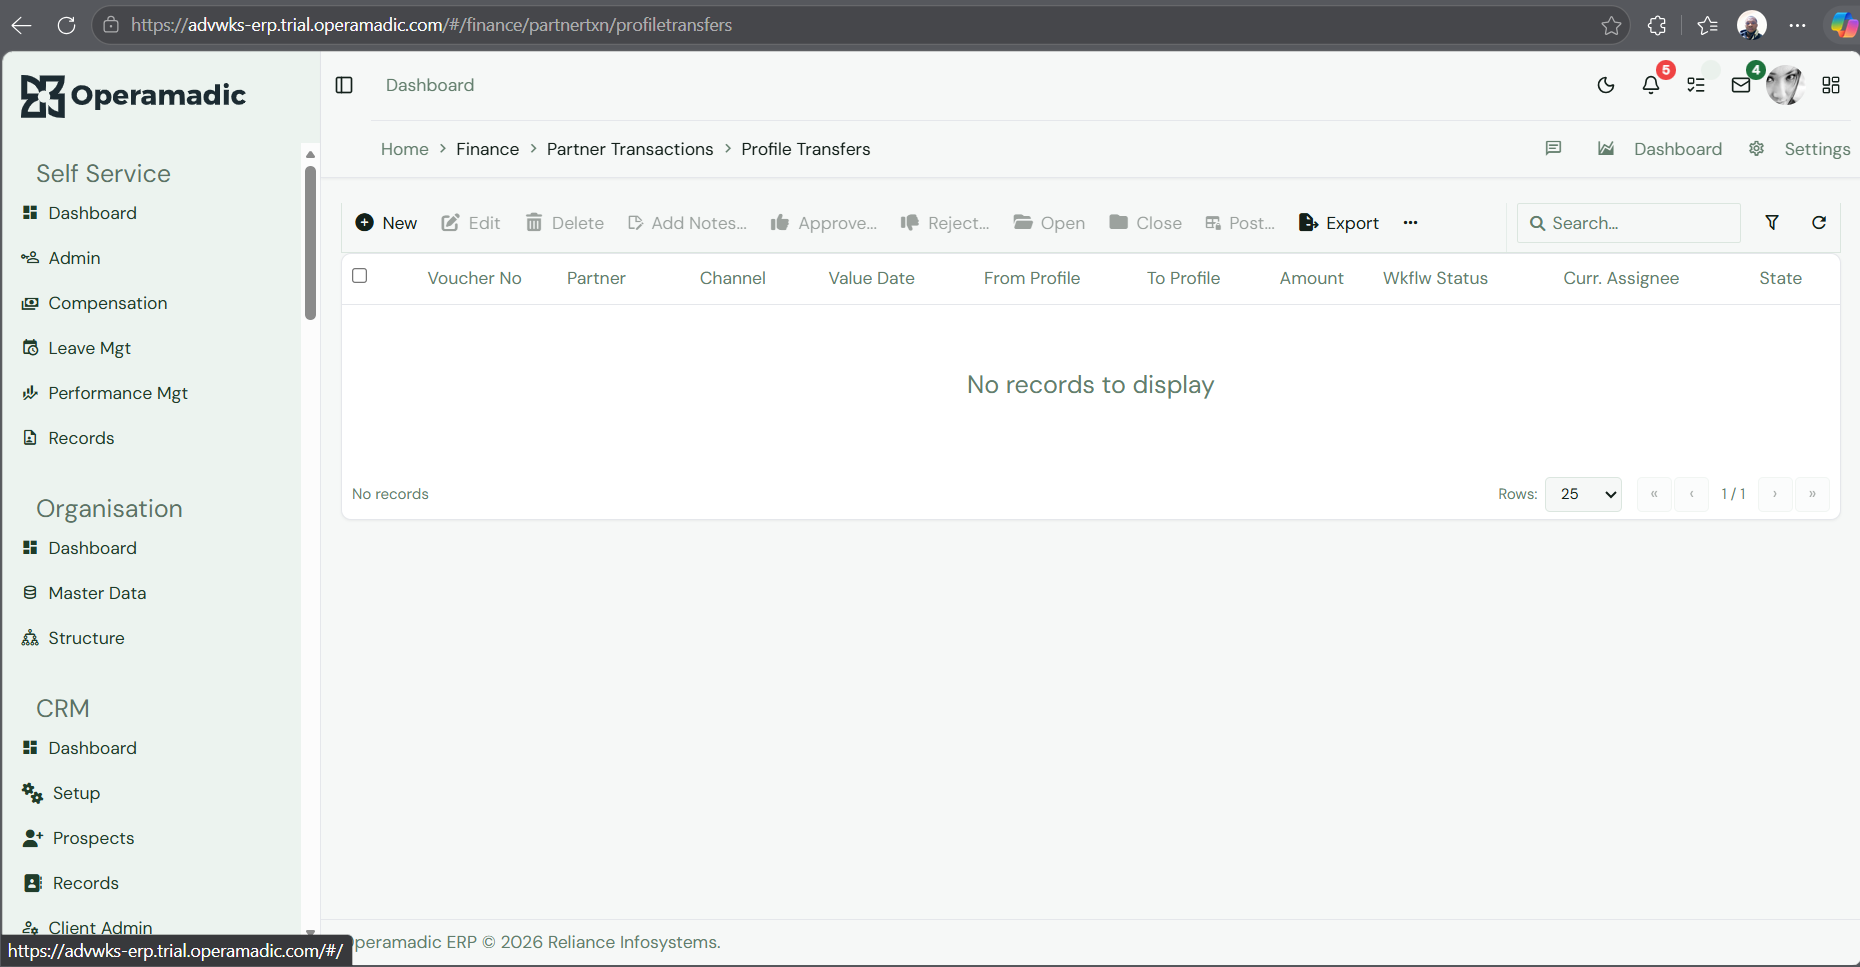
On the main navigation sidebar dashboard of Operamadic ERP, drill down into the Finance module.
Select Partner Transactions, and choose Profile Transfers to access the master table ledger view.
Fig 1 Navigating to profile transfers workspace
By default, the system displays the main list view registry. If no active parameters or transactions are immediately visible under your current scope, the workspace will clear and state “No records to display”.
To find specific historical transaction sequences or monitor your team’s workflow pipelines, use the robust target parameter matrix via the filter tool panel.
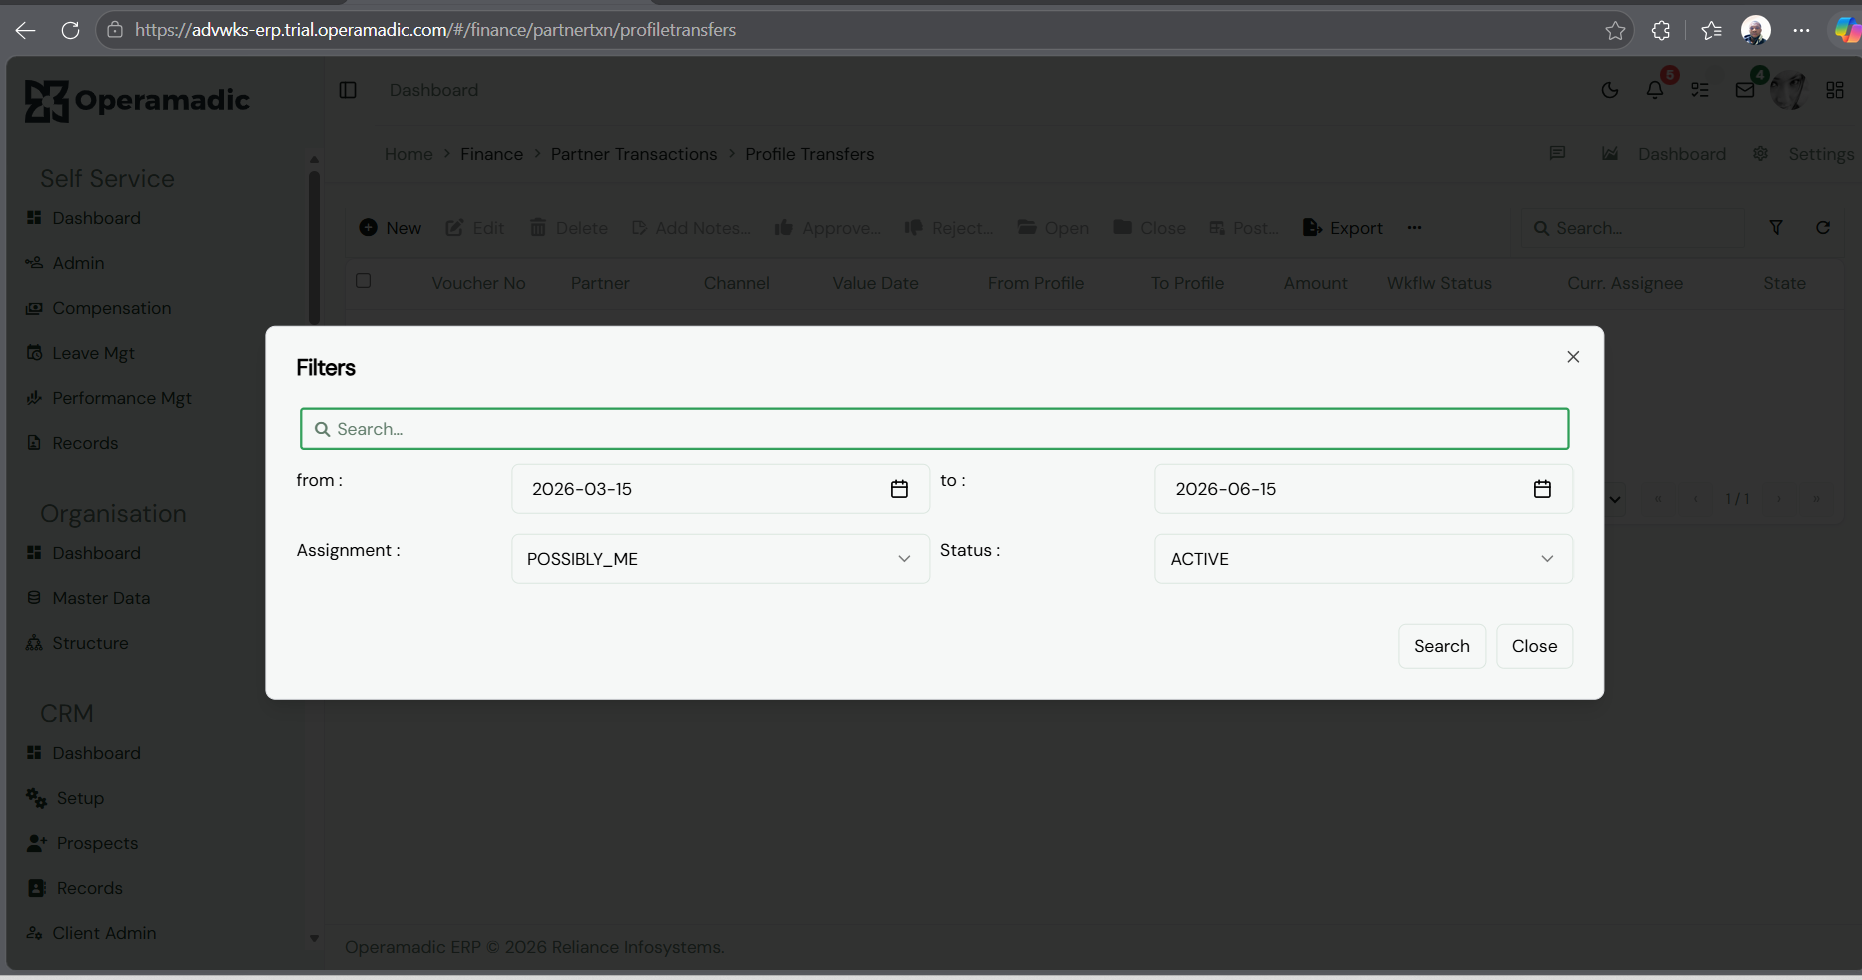
Click the Filter Icon located to the right side of the main workspace search bar.
A contextual Filters dialog window will appear overlaying the work pane.
Fig 2 Activating advanced filters popup window
Configure the parameters to pinpoint the files you need:
Date Range (from / to): Restrict transaction posting dates (e.g., look at the rolling quarterly performance running from 2026-03-15 to 2026-06-15).
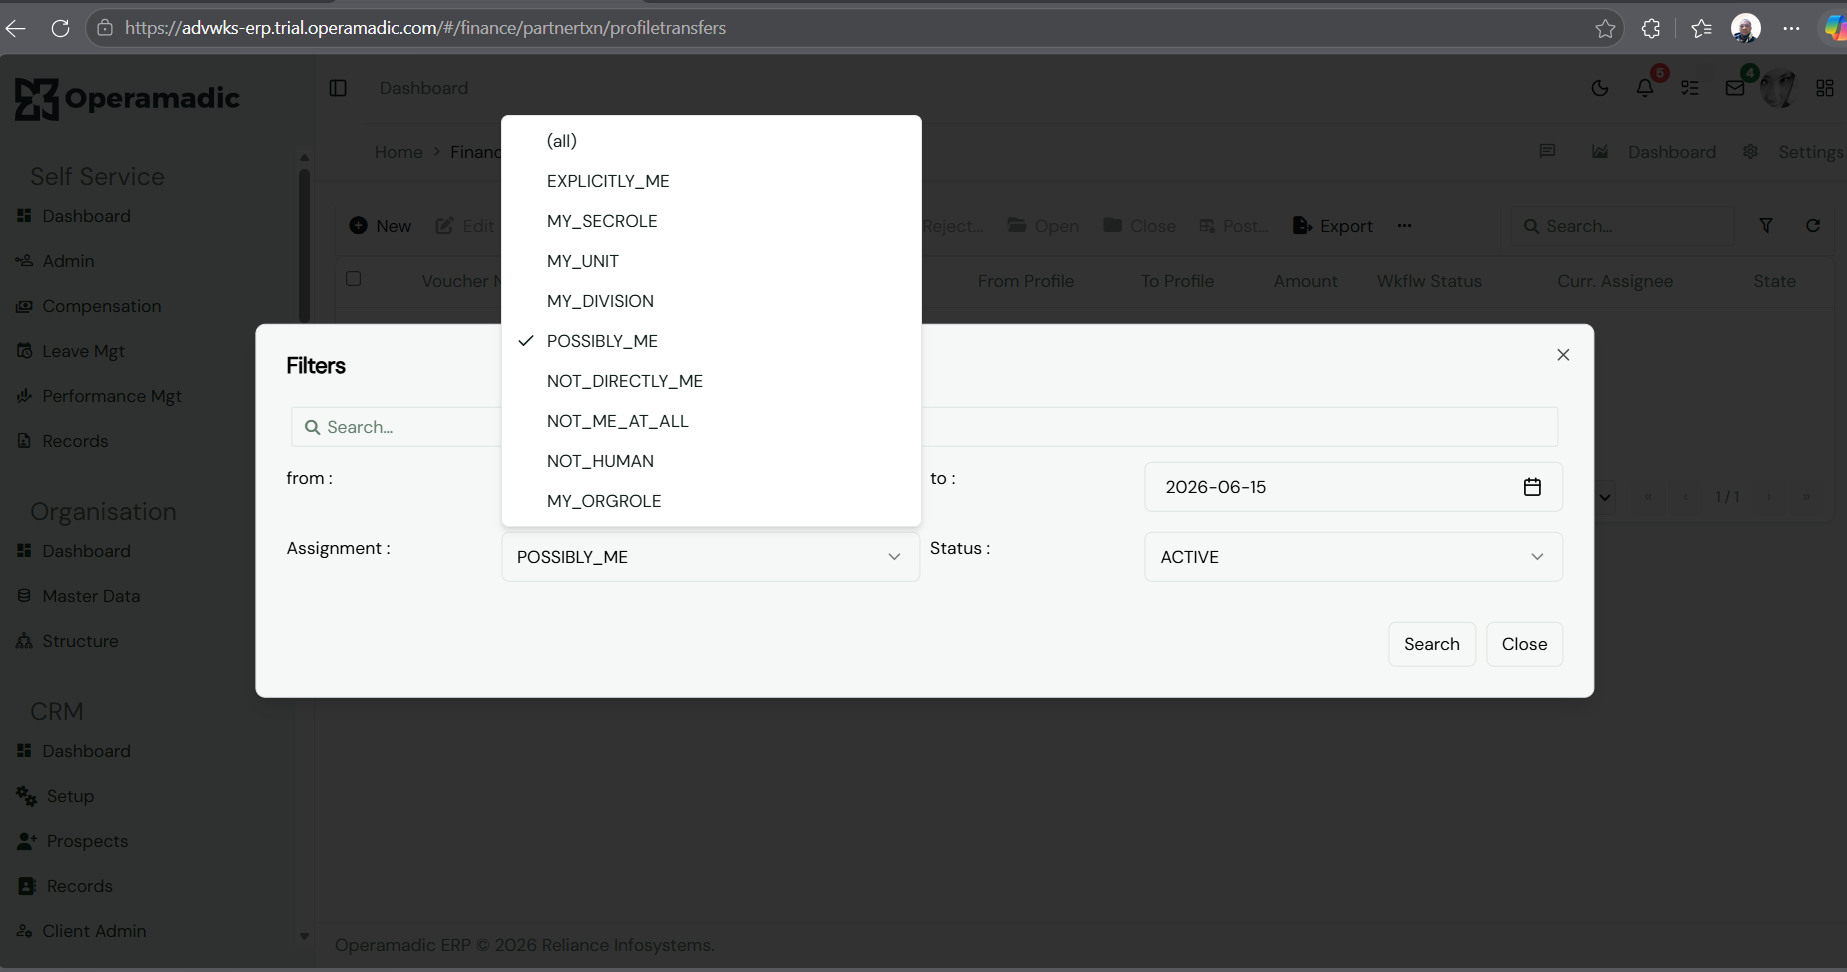
Assignment Dropdown: Filter based on responsibility status mappings. Available parameters include:
(all) – Broad administrative search view scope.
EXPLICITLY_ME / POSSIBLY_ME – Target vectors directly delegated to your logged-in user credential.
MY_SECROLE / MY_UNIT / MY_DIVISION / MY_ORGROLE – Refine results based on structural departmental roles or secure user permissions groups.
NOT_DIRECTLY_ME / NOT_ME_AT_ALL / NOT_HUMAN – Automated system background entries.
Fig 3 Assignment state parameters list selection matrix
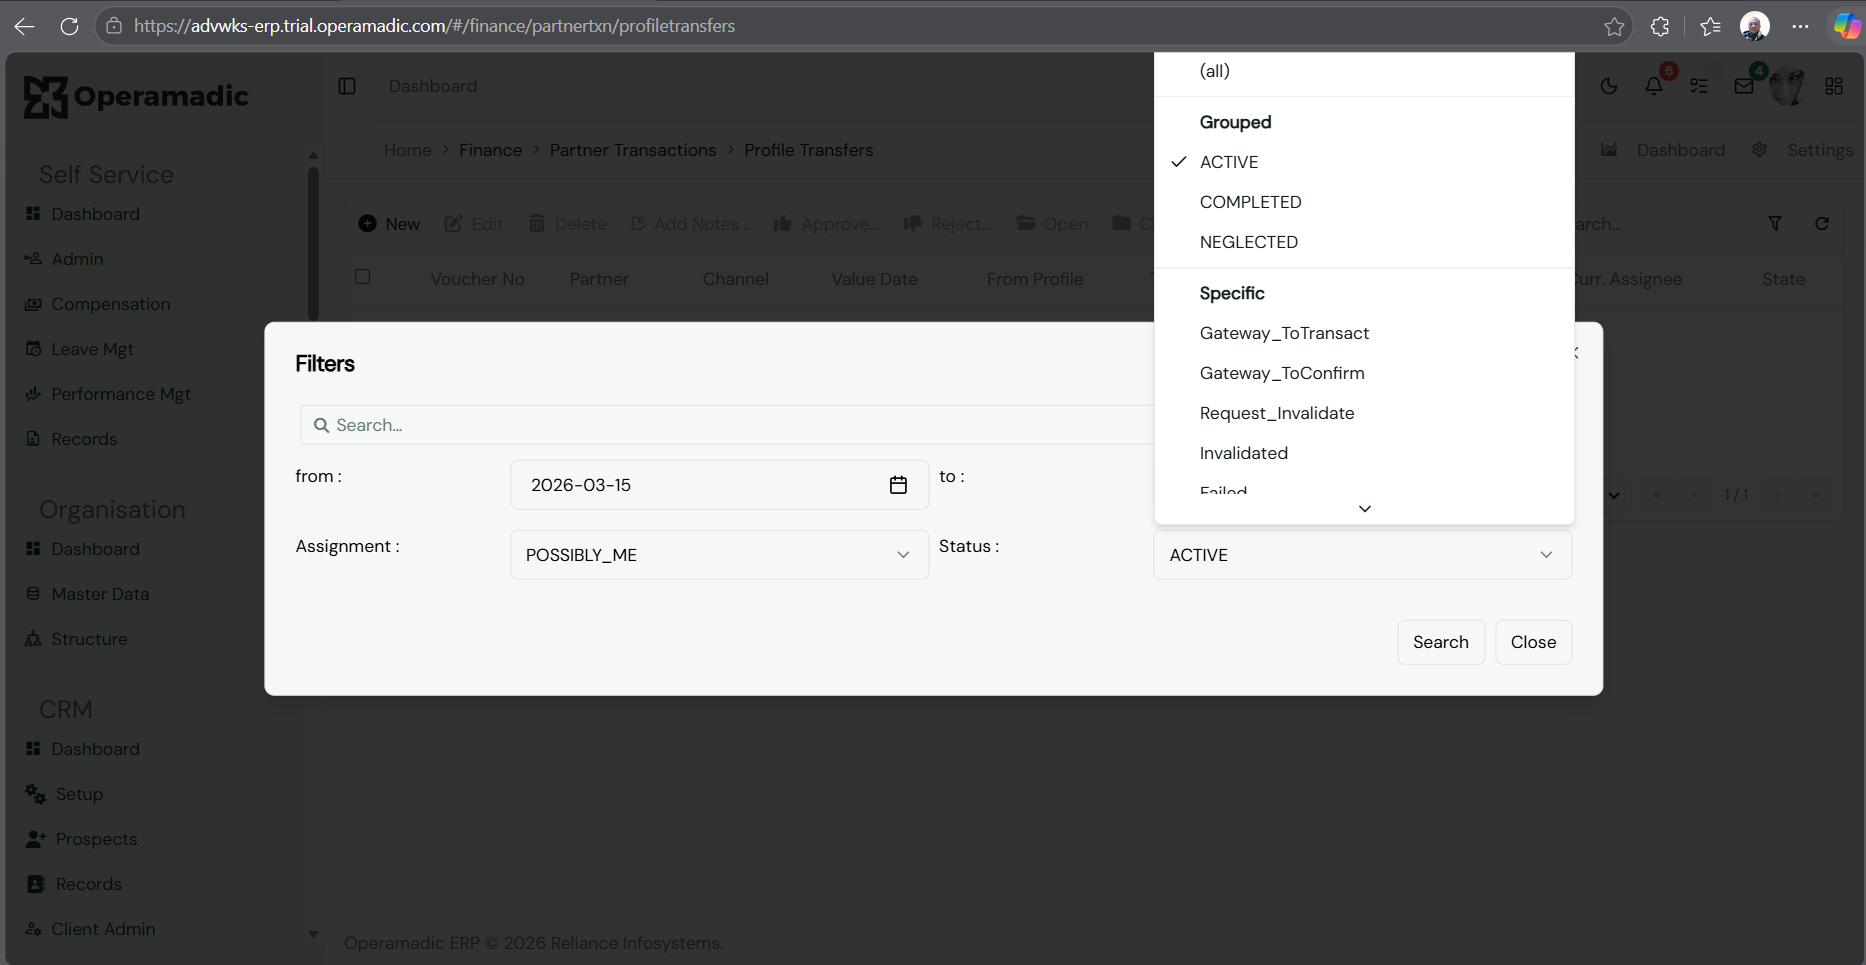
Status Dropdown: Group and query by system stage categorizations:
Grouped Statuses:ACTIVE, COMPLETED, or NEGLECTED.
Specific Step States: Fine-grained operational triggers like Gateway_ToTransact, Gateway_ToConfirm, Request_Invalidate, Invalidated, or Failed.
Fig 4 Status lifecycle categorizations filtering options
Hit Search to execute your filter parameters, or Close to discard.
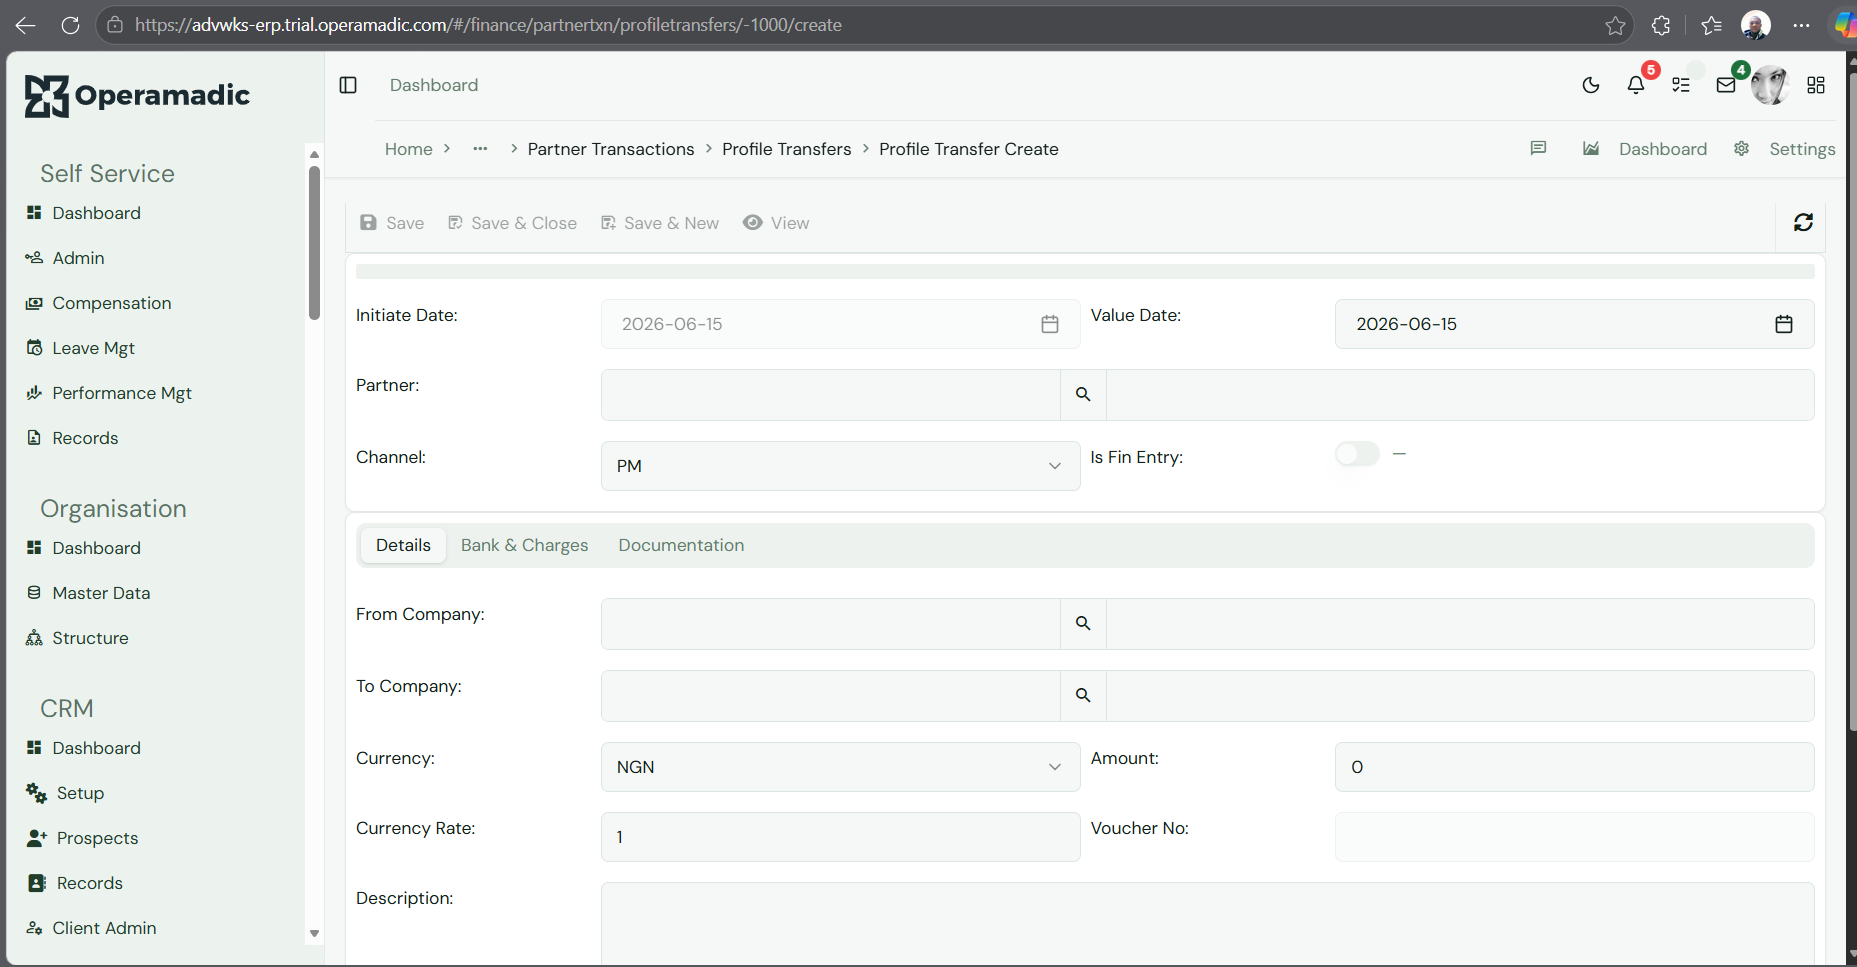
Initiate Date / Value Date: Set by default to the current active operational period (2026-06-15). Adjust the Value Date manually if negotiating delayed clearing settlement contracts.
Partner: Use the lookup magnifying glass tool to attach the parent legal corporate registry profile.
Channel: Select the handling delivery channel type (e.g., PM - Payment Manager).
Is Fin Entry: Toggle this slider to determine if this action should immediately update General Ledger balances upon approval.
From Company / To Company: Define the exact subsidiary debit location account profile and target credit destination account profile.
Currency / Currency Rate: Default local configuration setting (NGN base currency valued at a baseline exchange tracking factor of 1).
Amount: Specify the transaction value (e.g., 500000).
Fig 5 Profile Transfer Create form layout - Details Sub-Tab
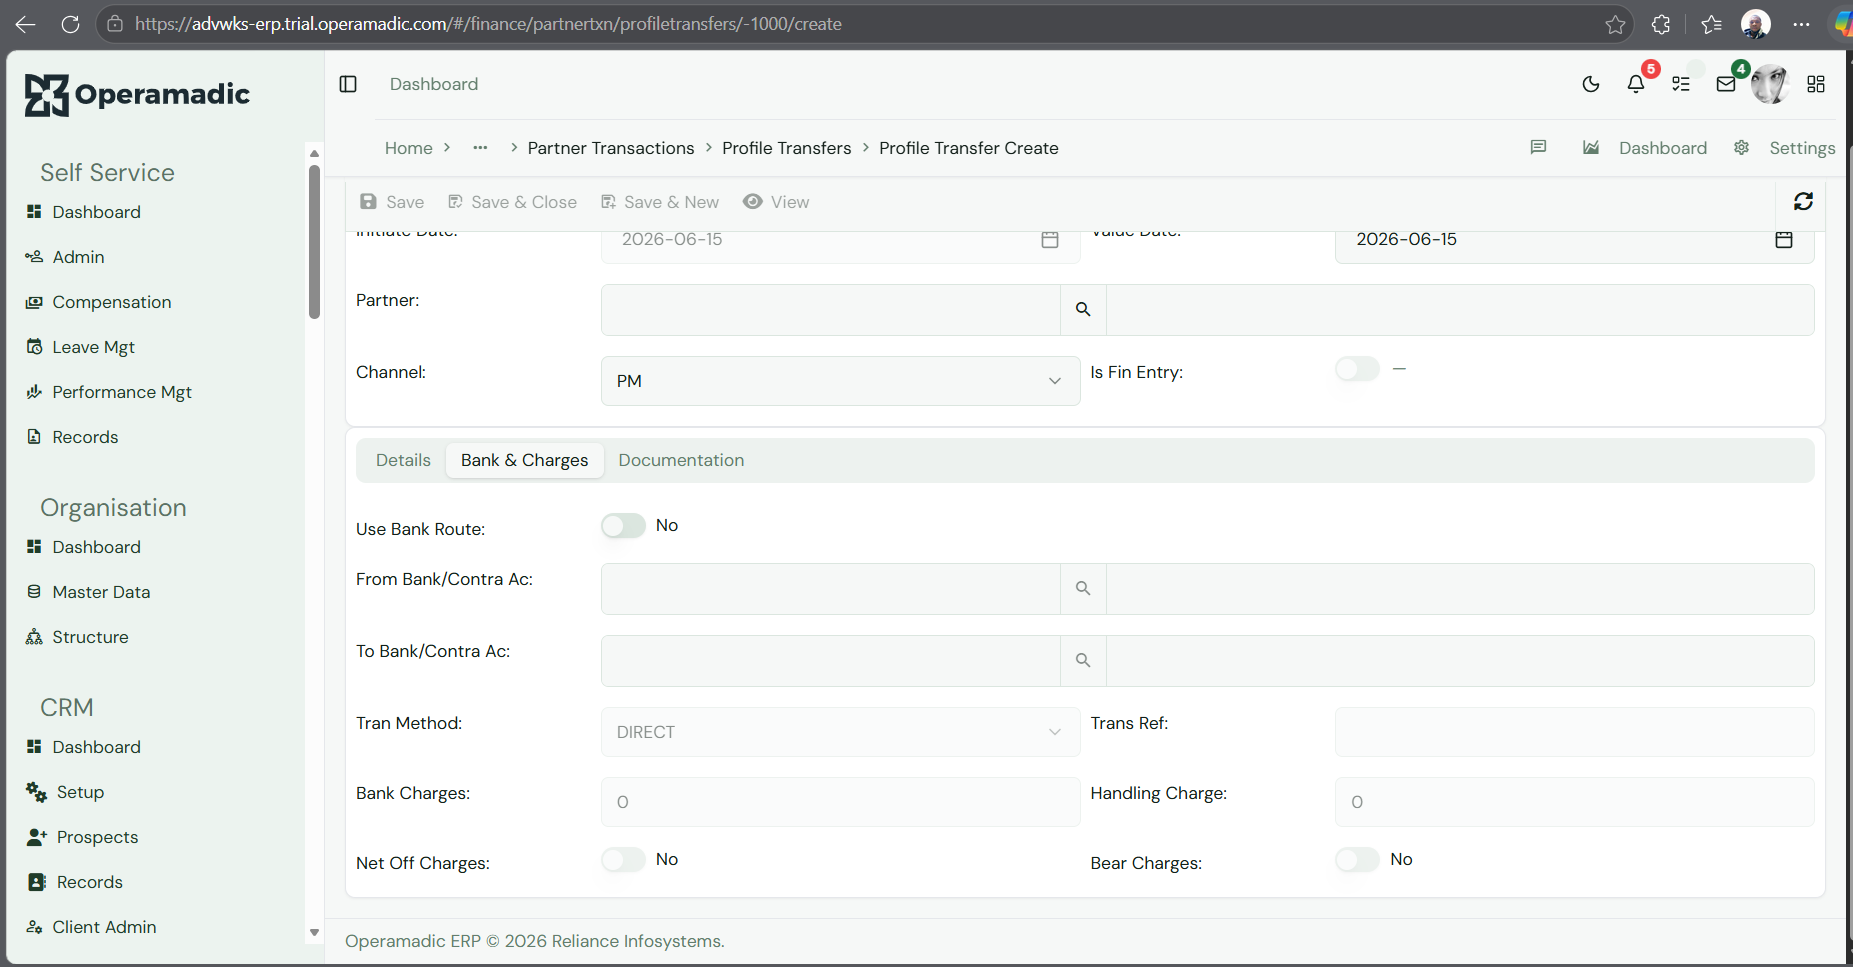
Click over onto the Bank & Charges tab page to append banking routing details and accounting friction parameters:
Use Bank Route: Toggle this switch if the transfer uses actual commercial bank clearings instead of a clean, internal journal adjustment ledger balance shift.
From Bank/Contra Ac & To Bank/Contra Ac: Bind explicit institutional bank statement accounts if moving external liquidity reserves.
Tran Method: Choose the settlement mechanism type (defaults to DIRECT).
Bank Charges / Handling Charge: Enter any fixed processing transaction expenses incurred via intermediaries to ensure clean reconciliation math.
Fig 6 Bank Routing details and processing fees tracking setup
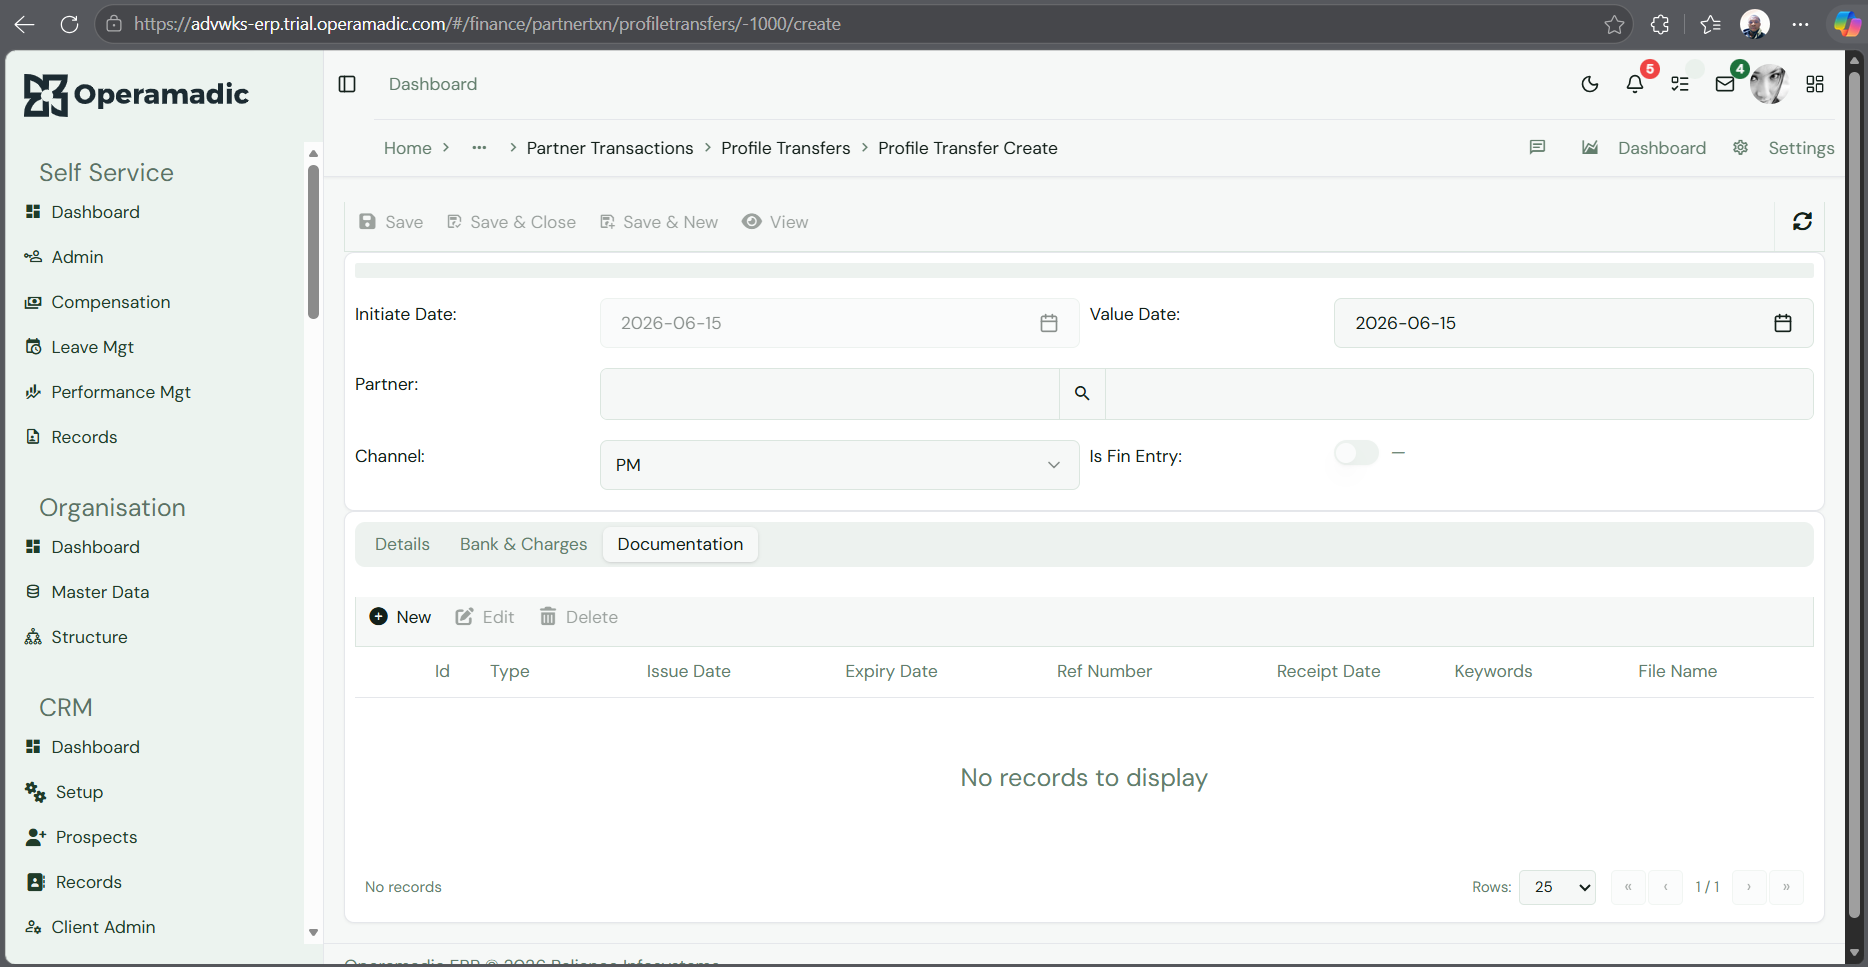
Click the Documentation sub-tab page to verify legal transaction compliance data trails (e.g., corporate board resolutions, signed deposit slips, bank receipts).
Inside the sub-grid table view area, click + New.
Fig 7 Activating file attachment sub-grid inside transfer document layout
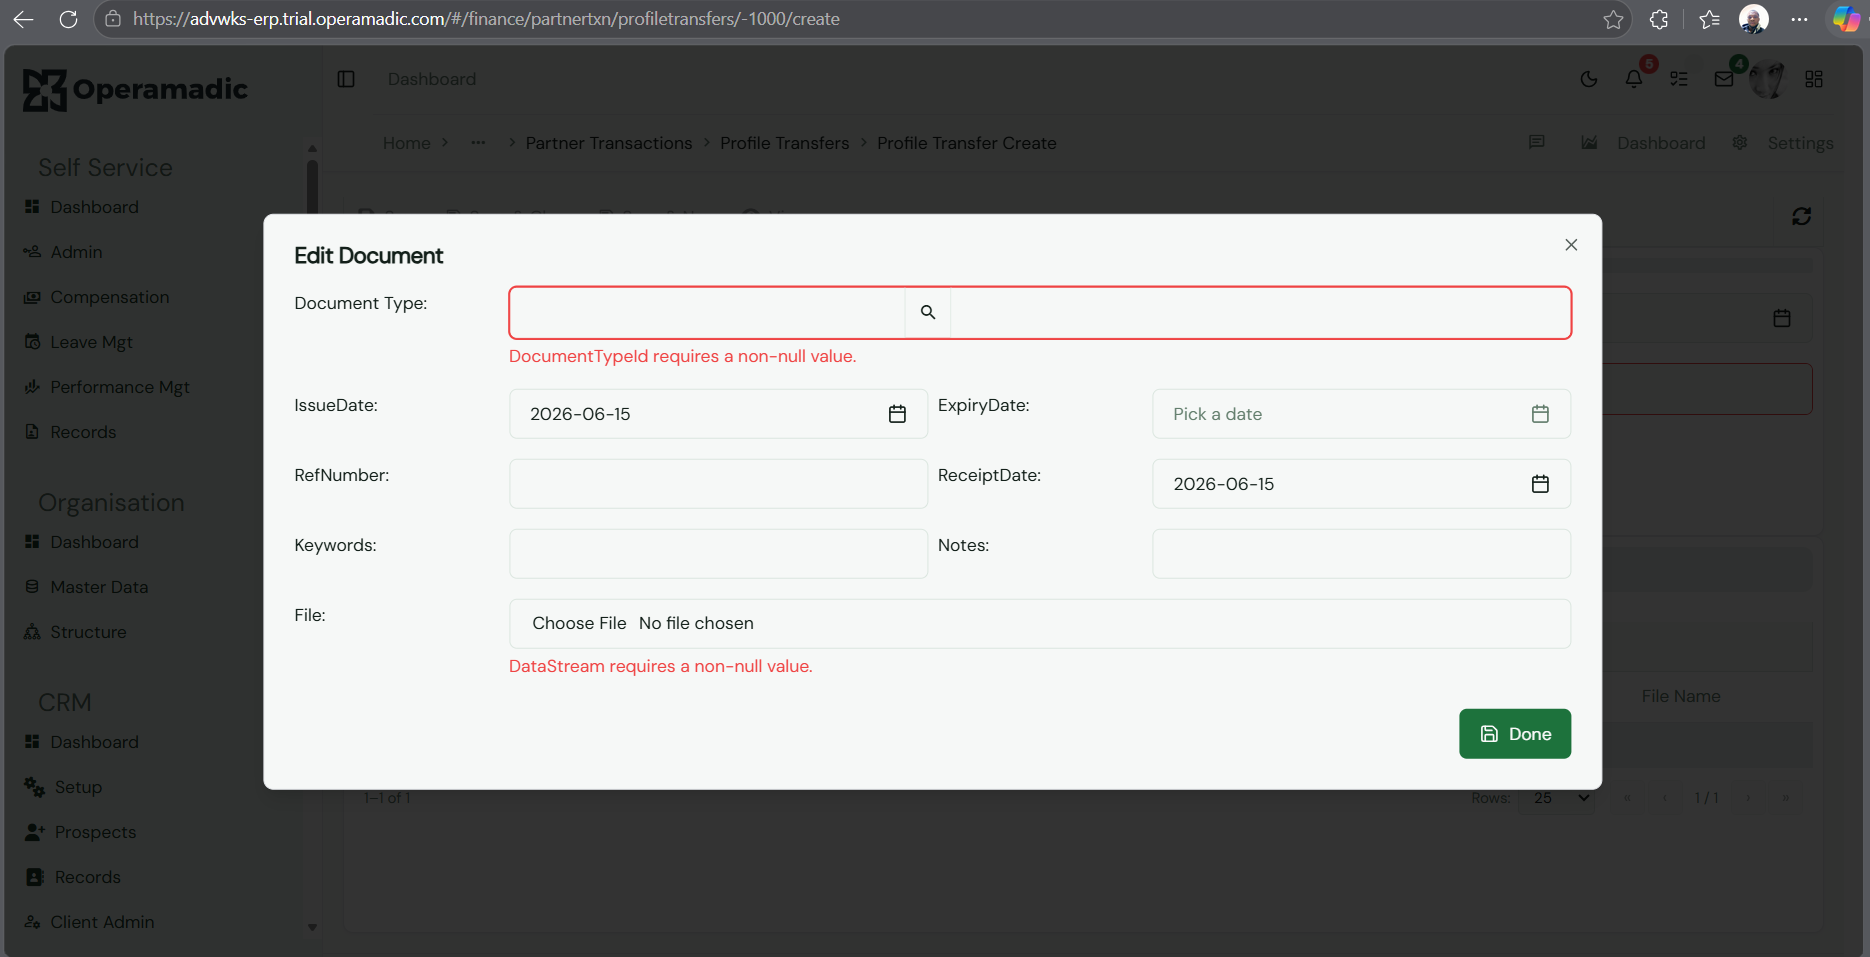
An Edit Document creation screen modal will prompt you for inputs:
Document Type: Use the lookup tool index selection to assign an administrative file category definition. (Note: This field requires a non-null entry to continue).
Issue Date / Expiry Date / Receipt Date: Populate transaction metadata tracking milestones.
Ref Number / Keywords / Notes: Key variables for index parsing and search lookups.
File Upload: Click Choose File to attach your digital document. (Note: A valid file payload stream is required).
Hit Done once validation fields resolve green, then return to the main entry layout page.
Once a Profile Transfer ledger record draft is fully configured, execute administrative steps directly from the primary list grid control row by highlighting a record row checkbox:
Edit: Modify a pending draft item configuration layout before commitment validation loops trigger.
Delete: Strip out draft record files completely from the sub-module indexing records.
Add Notes: Append a historical commentary log thread for auditing review tracking.
Approve / Reject: Authorizing workflows used by department leads to approve or stop pending internal balance movements.
Open / Close / Post: Use these commands to open drafts, finalize transactions, or run final ledger account ledger postings directly into your corporate General Ledger.